A Fresh Take on the Paper Bag Book Cover, freshstylemag.com, Aug. 21, 2014
There’s something about returning to the familiar and making it fresh again that gets the creative juices flowing. With school back in session and fall nearly upon us, we couldn’t think of a more appropriate craft renewal project than the paper bag book cover.
While we’re no longer looking for a great way to decorate our lockers, covering books isn’t just for students. A nicely decorated cover can accent a bookshelf or side table. It can also make for creative gift-wrapping if you’re giving a favorite read to a loved one.

If you’re new to crafting, paper projects are also an excellent way to get your creative feet wet. When you’re using inexpensive and easy-to-find supplies, if you make a mistake, you can easily start over or use a little tape for a quick fix. At the same time, you’re doing the kind of measuring, folding, lining up, and taping that prepares you for more involved endeavors.
Decorating the cover is the real creative outlet in this project. For ours, we decided to experiment with a few Chalk Paint® techniques. If you’re excited about one of Annie Sloan’s artistic painting methods, but don’t yet trust yourself on a piece of furniture, this is a great way to get more comfortable with the paint. If you create something you love, then you have a book cover to proudly display in your living room. If it’s not your favorite, then you can try another color or method on fresh paper. Either way, the experience will provide some confidence-boosting motivation for your next project.
Making the cover
Before you begin, here’s a handy refresher on how to make a paper bag book cover that will take you right back to high school algebra. We created two covers and cut out bands to wrap around the books for added splashes of color.
Chalk Paint® inspiration
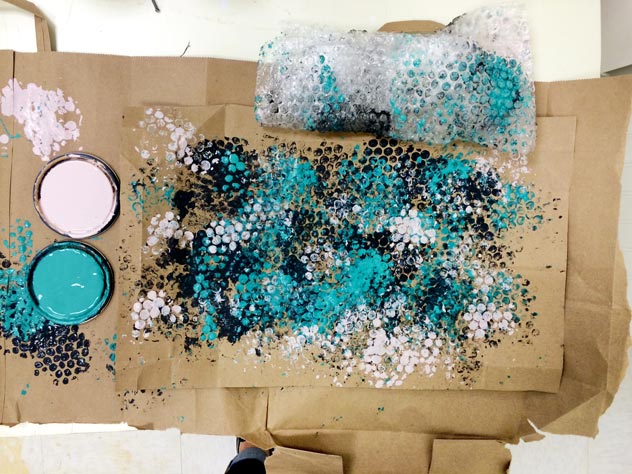
After cutting out the covers, we removed them from the books, and laid them out on another bag (you could also use a drop cloth). From the wide range of Chalk Paint® colors, we selected Antoinette, Graphite, and Florence for our covers. For the first cover, we used Annie’s bubble wrap technique, layering the different colors for a more artistic effect.
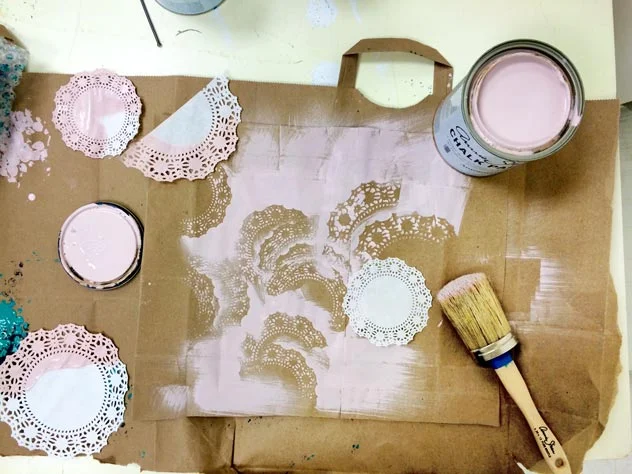
For the second cover, we opted for a more delicate look, using paper doilies as a stencil. We created a free-form design, moving the stencil around and alternating between small and medium-sized doilies. Starting with Antoinette, we finished the cover with a touch of graphite. We then painted the bands in accenting colors.
After the paint dried, we put the covers back on the books, and they were ready to go. It was a quick and easy project that yielded some lovely results.
We’d love to see more of your creative ideas. Share them with us on Facebook, Instagram or Twitter using the hashtag #creativeliving.